Saturday, February 27, 2016

烘焙坊@Mandarin Orange Chiffon Cake


Chinese New Year is just over~ Still having left over mandarin oranges at home? What to do with these mandarin oranges? 
Perhaps many would said, "aiya, just throw it away la…"
Hmmm... Isn't it a waste? 


How about getting some ideas & do upon these mandarin oranges? A GOOD idea right? 


Basic knowledge of Mandarin Orange:

Mandarin Orange (Citrus reticulata), also known as the mandarine, is a small citrus tree with fruit resembling other oranges. The taste is considered less sour, as well as sweeter & stronger.


Mandarin Orange Chiffon Cake


Ingredients:
A. 6 egg whites
     80g sugar

B. 6 egg yolks
     120mL mandarin oranges juice
      90mL oil (I use Natural brand oil, which contains omega 3 & 6)
      180g self raising flour
      2 tbsp peeled mandarin orange's skin
      1/2 tsp salt

Methods:
1. Sift the self raising flour. 
*I skip this step* LOL
2. Wash mandarin oranges, squeeze out the juice & peel the skin of mandarin oranges.


3. Beat the egg yolks, add in mandarin oranges juice, oil, salt & peeled mandarin orange's skin. Stir till well combined.
4. Slowly fold in self raising flour until well mix. Put aside.
5. In another bowl, beat the egg white with an electrical mixer until it's firm. Add in the sugar in between the beating. 

6. For (B) that well mixed, fold in the (A) by 3 times until well combined.
7. Pour the batter into a Chiffon Cake mould. Tap to kick out the air inside the batter after pouring.
8. Preheat the oven, 175 degree celcius. Bake for 38 min.


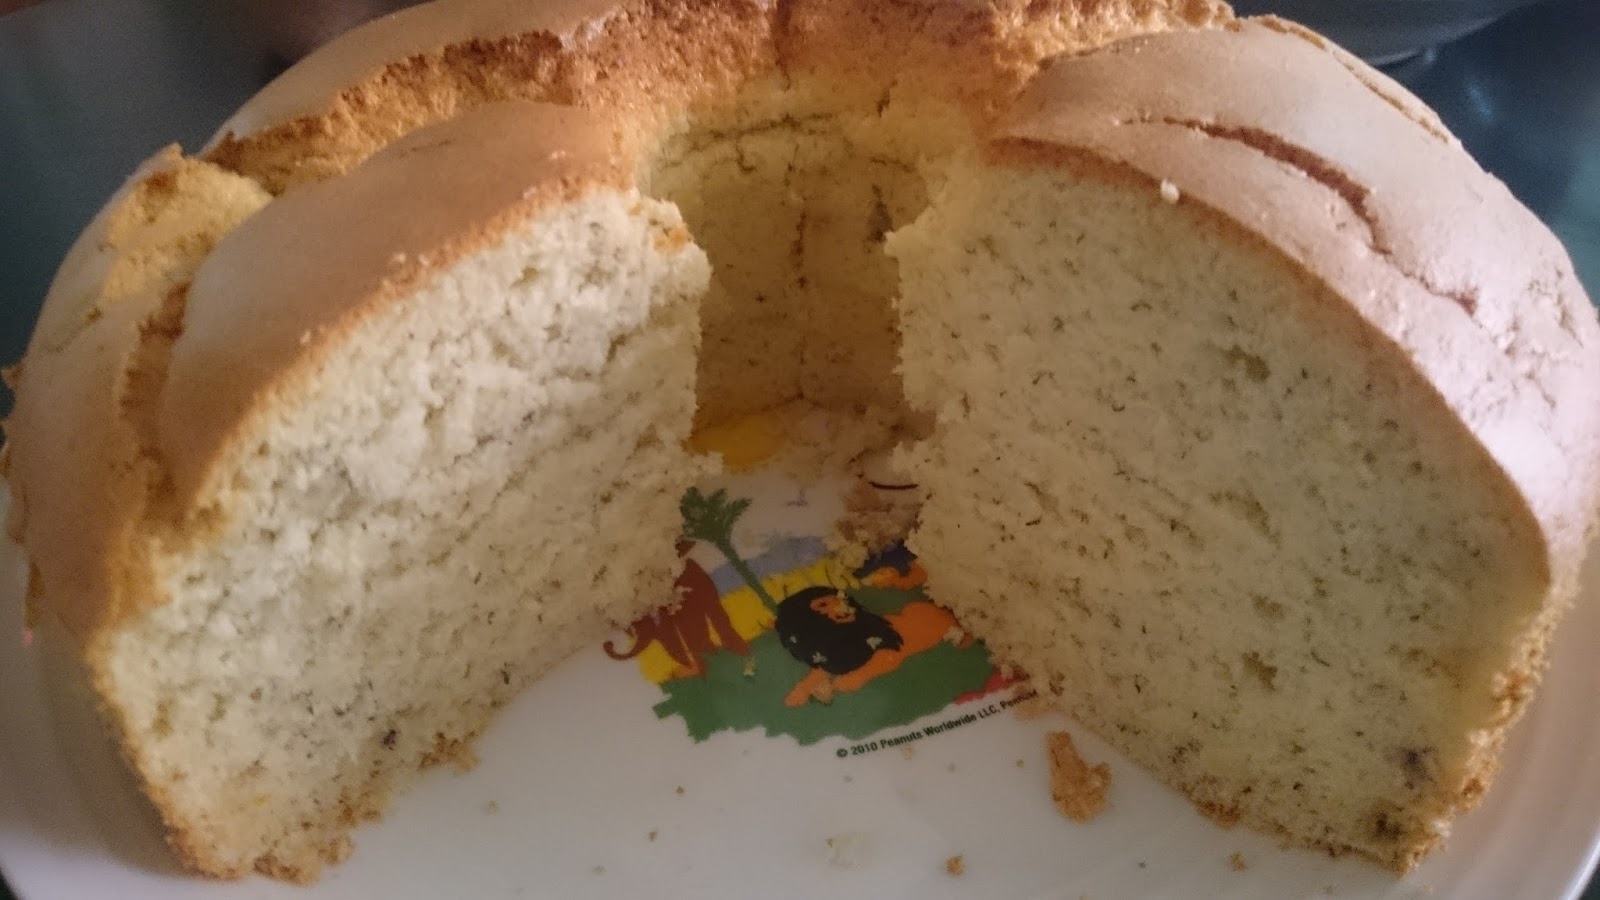
**Tada** Done! Enjoy it! 😁😁😁

Tuesday, February 23, 2016

烘焙坊@BANANA CHIFFON CAKE


                       1 piece of banana chiffon cake, more pieces to GO ! =D

Do you know about the health benefit of every food that we are eating? Perhaps most of the time we just take the food without knowing the good benefits it will bring for our health. Sometimes we might just skip the food because we do not like that food.

Here I would like to introduce some good health benefits of bananas.
1. Reduce depression
2. Regulate the bowel system
3. Reduce blood pressure & risk of heart disease
4. Help our bones grow stronger
5. Help individuals to quit smoking
6. Help prevent anemia
7. Provide us with energy
8. Reduce menstrual pains
9. Power our brains
10. Help prevent ulcers

~ BANANA CHIFFON CAKE ~

Ingredients:
A.
6 egg yolks
120g ripen banana 
60ml vegetable oil
120g Self Raising Flour (I used BlueKey Brand)
1/4 tsp salt

B.
6 egg whites
100g sugar
1 tsp lemon juice 


Here you GO !  *** Blink ***


Methods:
1. Sift the self raising flour. Set aside. 
* usually I skip this step. * LOL but today i did it ! =P


2. In a Bowl, mash the ripen banana. 


3. In a Bowl, beat the egg yolks lightly, add in vegetable oil and salt and whisked till well combined. Add in the mashed banana into egg yolk mixture, mix until it's well blended. Using the same whisk, add the sifted flour until it becomes well combined.
4. In another bowl, use an electric mixer to beat the egg whites using medium speed till frothy then add in lemon juice. Continue to beat till soft peak, gradually add in the sugar and continue to beat until stiff peak.


5. Add the meringue into the egg yolk batter 1/3 at a time, each time gentle mixed before adding next. When done, pour the batter into the Chiffon pan. 


6. Bake in a pre-heated oven on the lowest rack at 180 degree Celcius top/bottom heat for 35min. 
(Noxxa BreadMaker/ Multifunctional Oven)

6. Remove from oven, immediately invert the cake until completely cool.

DONE ! =)


Nevertheless, the texture was still soft and cottony. When I asked my mother whether she liked it, she commented "好吃, 不过我还是比较喜欢香草口味的." (loosely translated, nice but i still prefer pandan flavoured chiffon cake). *she used to love pandan flavoured cakes alot* 

Wednesday, February 17, 2016

烘焙坊@Pandan ChiFFon Cake


                                                Pandan Chiffon Cake, Yummy!

This is my second time baking a chiffon cake. My first attempt was 1 year ago when I baked a Lemon Black Sesame Chiffon Cake. I was elated being successful on my first attempt as I was told that the success rate for a chiffon cake is not high especially for a newbie.

As the mood of baking is initiated in my heart, hence the decision to try out the Pandan Flavour (use natural Pandan leaves to extract out the Pandan juice, without using any artificial flavoring). Here's sharing my second chiffon cake after a hiatus, it's moist and fluffy and of course delicious and fragrance! =)


~ PANDAN CHIFFON CAKE ~

Ingredients:
A.
6 egg yolks
60ml Pandan juice (extracted from 12 Pandan Leaves + ~40ml water)
60ml vegetable oil
130g Self Raising Flour (I used BlueKey Brand)
1/4 tsp salt

B.
6 egg whites
130g sugar
1 tsp lemon juice 


Methods:
1. Sift the self raising flour. Set aside. 
* usually I skip this step. * LOL
2. In a Bowl, beat the egg yolks lightly, add in vegetable oil and salt and whisked till well combined. Add in the Pandan Extract into the egg yolks mixture, mix till well blended. Using the same hand whisk, add in the sifted flour till well combined.
3. In another bowl, use an electric mixer to beat the egg whites using medium speed till frothy then add in lemon juice. Continue to beat till soft peak, gradually add in the sugar and continue to beat until stiff peak.


4. Add the meringue into the egg yolk batter 1/3 at a time, each time gentle mixed before adding next. When done, pour the batter into the Chiffon pan.


5. Bake in a pre-heated oven on the lowest rack at 180 degree Celcius top/bottom heat for 35min. 
(Noxxa BreadMaker/ Multifunctional Oven)

6. Remove from oven, immediately invert the cake until completely cool.


Isn't it just that simple? Let's try it out! ^___^


Friday, August 28, 2015

烘焙坊@Lemon Black Sesame ChiFFon


A long time I didn't have any time to bake. I know it's actually a lousy reason... =P
I love the Quotes : " You'll never learn, if you don't make mistakes " as it reflects on me where I used to bake a failure cake before.

Today, I take the initiative to try again on baking a Chiffon. 

"Lemon Black Sesame Chiffon " ~

Ingredients:
(1) 5 eggs - separate egg white & egg yolks
(2) 1 whole lemon
(3) ~80g of  sugar
(4) 100g of self raising flour
(5) 2 tablespoon of Black Sesame powder

Methods:
(1) Sift the self raising flour & Black Sesame powder. (for me, I usually skip this step... lol)
(2) Wash, Cut & Squeeze the lemon to get the lemon juice.
(3) For the eggs, separate out the egg white & egg yolks.
(4) For egg yolks, gently beat it in a bowl. Then add in the lemon juice & self raising flour. Stir well. 
(5) Divide the mixture into 2 portions - 
     1 portion just egg yolk + self raising flour; 
     another portion: add in Black Sesame powder, mix well = egg yolk + self raising flour + Black Sesame powder 
(6) After that, leave it aside.
(7) For egg white, add in 1 teaspoon of lemon juice (replace for cream of tartar) and sugar.
(8) Beat & Stir until the egg white becomes stiff & firm.  
(9) Then, fold in the egg white batter into the 2 portions of ready mixture. Stir well (1 direction only)
(10) Pour the mixture into the ChiFFon mould.
(11) Bake in the oven, 180 degree Celcius, ~40min.


Yeay... Success ! Yummy ~ ^___^

Enjoy ya~

Sharing some knowledge too... Hehe...

Monday, December 22, 2014

烘焙坊@Eggless Coconut Cake

Looking for eggless cake? Yet no ideas or having no recipes on how to bake it? Let's try this recipe out !  =)

Benefits of Coconut:
(1) Helps Prevent Obesity
(2) Improve Heart Health (short chain fatty acids)
(3) High in dietary Fiber
(4) Low Glycemic Index

Eggless Coconut Cake
Done ! ^___^ Nice ?


Ingredients:
(1) 200g Self Raising Flour (Blue Key)
(2) 100g Sugar
(3) 100g Planta Margarine (can be reduced to 80g)
(4) 50g Coconut Powder
(5) 150mL Water 
(6) Chocolate Bar
(7) Mozzarella Cheese (Decoration)

Methods:
(1) Using double boil method, melt the chocolate bar and set aside.
(2) Stir and Mix the coconut powder with 150mL water.
(3) Sift the self raising flour.
(4) In a big bowl, mix the sugar and planta margarine until fluffy white colour.
(5) Add in the coconut milk and fold in the self raising flour until a complete batter.
(6) Divide the batter into 2. 1 of the batter mix with the melted chocolate.
(7) Pour the batter into a baking pan.
(8) Decorate with the Mozzarella Cheese.
(9) Preheat the oven, 180 degree celcius.
(10) Bake the cake, 180 degree celcius, ~40 min.
(11) Yeah, Bake !!!! 

Easier ? Hope you enjoy it !  =)

Friday, December 12, 2014

厨房忙@Black Bean, Sesame Pau with Potato Fillings


How often will you be taking Pau as your preference breakfast or as a tea time choice? Pau or in Mandarin "包子", Baozi is a type of steamed, filled bun in Chinese cuisine. In Malaysia, it is easy to find Pau in every restaurants to fill your hungry stomach. 

Today, I would like to introduce a Healthier, Nutritious, Delicious choice & an easy recipe to make Homemade Baozi on yourself. At the end, you can try and make it everytime, everyday and enjoy it without any worrying of hygienic issues.  =)

Here you Go ! <Black Bean, Sesame Pau with Potato Fillings>


> Ingredients: 
A. Pau Skin

(1) Pau Flour - 300g
(2) Black Bean & Sesame Powder - 6 tablespoon
(3) Planta Margarine - 1 tablespoon
(4) Sugar - 1 tablespoon
(5) Water - 100mL (depends & adjustable)
(6) Mauripan yeast - 5 g


B. Pau Fillings
(1) Potato  
(2) Onion
(3) Carrot
(4) Vegetarian G soy
(5) Sesame
(6) Salt
(8) Black pepper 
(7) Oil / Planta Margarine

>Methods:
(1) In a bowl, mix Mauripan yeast with warm water, set aside.
(2) In a big bowl, mix pau flour, black bean & sesame powder, planta margarine, sugar and Mauripan yeast together. 
(3) Slowly add in the water into (2) and knead the dough with hand until the dough becomes smooth and extensible. 
(4) Then, set aside the dough for ~15-20 min (rest).
(5) For Pau fillings, cut the potato, onion, carrot, vegetarian G soy into cubes. Heat a wok, add in oil/planta margarine. Then, stir fry onion, carrot, potato and vegetarian G soy until ~cooked. Add in pinch of salt and black pepper for taste and garnish with some sesame. Lastly, put in a big bowl for later use.
(6) After the dough set aside for ~15-20 min, scale the dough into 50g each.
(7) Round and Flatten the dough and place the filling at the centre of the diugh.
(8) Allow the pau doughs to rest for approximately 35 min.
(9) Place all the dough pieces in a steamer and steam for 10 min over high heat.
(10) Ok, serve it HOT !!! ^___^

Do you like it ? Hope you enjoy it ! =)

Saturday, October 11, 2014

厨房忙@Fresh Mushroom Soup


Looking around and Craving for Mushroom Soup? Planning to buy Campbells brand - Cream of Mushroom due to time saving on preparation, but struggling in thinking of whether is it "healthy" or not? (although stated contains No MSG)

Why not just prepare on yourself? It's Not time consuming, Simple Ingredients. No MSG, No Preservative.  Fresh, Tasty, Healthier yet Nutritious Mushroom Soup. 


Ingredients:
(1) 200g Fresh Button Mushroom
(2) 350g Potatoes
(3) 300g Milk (I use Dutch Lady Low Fat Milk because a lot of the stocks at home... lol)
(4) 800mL Water (adjustable)
(5) Pinch of salt
(6) Dash of Pepper
(7) 1 tablespoon of Butter (I use Planta margarine)
(8) Onions (Optional - But I didn't put)

Methods of Cooking:
(1) Peel potatoes. 
(2) Cut potatoes into small cubes. 
(3) Place some of them into a blender and blend them. Left about 1/3 of the potatoes for later use purpose.
(4) Chop the fresh button mushrooms.
(5) Place some of the chopped fresh button mushrooms into a blender and blend. Left about 1/3 of the button mushrooms for later use purpose.
(6) In a pot, adding in the water, pour the puree of both potatoes and bitton mushrooms.
(7) Over the medium fire, add in the left potatoes and button mushrooms together and boil. Stir while boiling
(8) After boiling, add in the milk, salt, butter and pepper. (make sure to adjust the taste on your own)
(9) Done !

Serve in on yourself. Enjoy!  =)